Stripe & Next.js: Master Subscription Billing for SaaS Success
Learn to integrate Stripe with Next.js for seamless subscription billing in SaaS platforms. This guide covers setup, advanced management, and best practices.

Zakariae
Building a successful SaaS platform requires more than just great features. You need a reliable, scalable payment infrastructure that can handle recurring subscriptions, manage customer billing cycles, and adapt to your growing business needs. The combination of stripe nextjs has emerged as the gold standard for modern subscription billing, offering developers a powerful toolkit to create seamless payment experiences while maintaining full control over their application architecture.
Whether you are launching a no-code platform builder, a multi-tenant application, or a client portal system, understanding how to properly integrate Stripe with Next.js can mean the difference between a payment system that scales effortlessly and one that becomes a constant source of technical debt. This comprehensive guide walks you through everything from initial setup to advanced subscription management strategies used by successful SaaS platforms across the United States.
Key Takeaways
- Stripe Checkout provides the fastest path to accepting subscription payments in Next.js applications, with built-in compliance and mobile optimization.
- Webhook integration is essential for maintaining accurate subscription states and triggering automated workflows in your SaaS platform.
- Server Actions in Next.js 15 simplify payment processing by eliminating the need for separate API routes in many scenarios.
- Multi-tenant architectures require careful consideration of Stripe Connect for marketplace-style billing or isolated customer management.
- The Customer Portal dramatically reduces support burden by letting users manage their own subscriptions, payment methods, and billing history.
- Proper error handling and idempotency prevent duplicate charges and ensure reliable payment processing under all network conditions.
- Testing with Stripe CLI before production deployment catches integration issues early and validates webhook handling.

Understanding the Stripe and Next.js Ecosystem
The pairing of Stripe with Next.js has become increasingly popular among SaaS developers for good reason. Next.js provides the server-side rendering capabilities, API routes, and edge functions that modern payment integrations demand, while Stripe offers the most comprehensive payment processing API available. Together, they enable developers to build subscription billing systems that rival those of enterprise platforms.
When evaluating payment solutions for your SaaS platform, several factors make this combination particularly compelling. Next.js handles the complexity of server-side operations securely, keeping sensitive payment logic away from the client browser. The framework's built-in API routes (or the newer Server Actions) provide natural integration points for Stripe's server-side SDK, eliminating the need for a separate backend service in many cases.
Stripe's subscription billing infrastructure handles the heavy lifting of recurring payments, including proration calculations, trial period management, and automatic retry logic for failed payments. This means you can focus on building your core product features rather than reinventing billing logic. The platform processes billions of dollars annually for companies ranging from startups to Fortune 500 enterprises, providing battle-tested reliability.
For developers working with a Next.js boilerplate or SaaS template, Stripe integration typically comes pre-configured, saving dozens of hours of initial setup time. These starter kits often include webhook handlers, customer portal integration, and subscription state management out of the box, allowing you to customize rather than build from scratch.
Setting Up Your Stripe Account for Subscription Billing
Before writing any code, proper Stripe account configuration establishes the foundation for your subscription system. Start by creating a Stripe account if you have not already, then navigate to the Dashboard to configure your business settings. Enable test mode initially to develop and test your integration without processing real transactions.
Your product catalog in Stripe defines what you sell and how you charge for it. For subscription-based SaaS platforms, you will typically create products representing your service tiers (such as Basic, Professional, and Enterprise) with associated recurring prices. Each price specifies the amount, currency, and billing interval. Consider creating both monthly and annual pricing options, as annual subscriptions improve cash flow and reduce churn.
Navigate to the Products section in your Stripe Dashboard and create your first product. Assign it a clear name that customers will recognize on their credit card statements. Then add prices to this product, specifying whether they bill monthly, annually, or on a custom interval. You can also configure usage-based pricing if your platform charges based on consumption metrics like API calls or storage.
Pro Tip: Use Stripe's metadata fields to store your internal product identifiers and feature flags. This creates a clean mapping between Stripe's system and your application's entitlement logic, making it easier to determine what features each subscription tier unlocks.
Configure your tax settings if you need to collect sales tax or VAT. Stripe Tax can automatically calculate and collect the appropriate taxes based on your customer's location, which is particularly important for SaaS platforms serving customers across multiple US states or internationally. This automation saves significant compliance headaches as your customer base grows.
Installing and Configuring the Stripe SDK in Next.js
With your Stripe account configured, the next step involves setting up the development environment. Install the Stripe Node.js SDK and the Stripe.js client library using your preferred package manager. The server-side SDK handles secure operations like creating subscriptions and processing webhooks, while the client library manages frontend elements like the payment form.
Run the following command to install the necessary packages:
npm install stripe @stripe/stripe-js
Create a dedicated Stripe utility file to initialize the SDK with your API keys. Store your secret key in environment variables, never in your codebase. Your .env.local file should contain both your publishable key (safe for client-side use) and your secret key (server-side only):
NEXT_PUBLIC_STRIPE_PUBLISHABLE_KEY=pk_test_...
STRIPE_SECRET_KEY=sk_test_...

Create a server-side Stripe instance that you can import throughout your application:
In your lib/stripe.ts file, initialize Stripe with your secret key and specify the API version. Using a fixed API version ensures your integration behaves consistently even as Stripe releases updates. This prevents unexpected breaking changes from affecting your production system.
For the client-side, create a separate utility that loads Stripe.js asynchronously. The loadStripe function from @stripe/stripe-js returns a promise that resolves to the Stripe object, which you will use to redirect customers to Checkout or mount payment elements. This lazy loading approach improves initial page load performance.
Implementing Stripe Checkout for Subscription Sign-ups
Stripe Checkout provides the fastest path to accepting subscription payments with minimal frontend code. This hosted payment page handles card validation, 3D Secure authentication, and mobile optimization automatically. For most SaaS platforms, Checkout offers the best balance of conversion rates and development speed.
The implementation follows a straightforward pattern: your Next.js application creates a Checkout Session on the server, then redirects the customer to Stripe's hosted page. After payment completion, Stripe redirects back to your success or cancellation URL. This approach keeps sensitive payment handling entirely on Stripe's PCI-compliant infrastructure.
Create an API route (or Server Action in Next.js 15) that generates the Checkout Session. Specify the price ID for the subscription tier the customer selected, along with success and cancel URLs. Include the customer's email if you already have it to pre-fill the payment form:
Your checkout session configuration should include the mode set to subscription, which tells Stripe to create a recurring billing relationship rather than a one-time charge. Include metadata to track which user in your system initiated the checkout, enabling you to link the resulting subscription to the correct account.
On the frontend, create a button that calls your API endpoint and redirects to the Checkout URL. The redirect happens client-side using the session URL returned from your server. This pattern works reliably across all browsers and devices without requiring you to handle payment form rendering.
For a more integrated experience, consider Stripe's embedded Checkout, which renders the payment form directly on your page. This approach maintains your branding throughout the payment flow while still leveraging Stripe's hosted payment processing. The tradeoff is slightly more implementation complexity.
Building Custom Payment Flows with Stripe Elements
While Checkout works excellently for most scenarios, some SaaS platforms require deeper customization of the payment experience. Stripe Elements provides embeddable UI components that you can style to match your brand while Stripe handles the security and compliance aspects. This approach gives you complete control over the user experience.
Elements work by creating secure iframes that capture payment information without it ever touching your servers. You can customize colors, fonts, and layouts to create a seamless checkout experience that feels native to your application. The components handle validation, error messaging, and accessibility automatically.
Implementing Elements requires more code than Checkout but offers significant flexibility. Start by wrapping your payment form with the Elements provider from @stripe/react-stripe-js. Then use components like CardElement or the newer PaymentElement to render the payment input fields. The PaymentElement automatically supports multiple payment methods based on your Stripe Dashboard configuration.
When the customer submits the form, use the confirmPayment method to process the subscription. This method handles 3D Secure authentication flows automatically, displaying the bank's verification modal when required. Your server creates a PaymentIntent or SetupIntent beforehand, and the client confirms it with the customer's payment details.
For subscription billing specifically, you will typically use SetupIntent to save the payment method, then create the subscription server-side using that saved method. This separation allows you to validate the payment method before committing to the subscription, reducing failed payment rates from the start.
Webhook Integration for Real-Time Subscription Updates
Webhooks form the backbone of reliable subscription management. Stripe sends webhook events to your application whenever something significant happens: a subscription is created, a payment succeeds or fails, a customer updates their payment method, or a subscription is canceled. Your application must handle these events to maintain accurate subscription states.
Create a webhook endpoint in your Next.js application that receives POST requests from Stripe. This endpoint must verify the webhook signature to ensure the request genuinely came from Stripe and was not tampered with. Use the stripe.webhooks.constructEvent method with your webhook signing secret to validate incoming events.
The most critical events for subscription billing include:
- checkout.session.completed: A customer completed the Checkout flow and their subscription is now active.
- customer.subscription.created: A new subscription was created (may fire before payment confirmation).
- customer.subscription.updated: The subscription changed, such as a plan upgrade or downgrade.
- customer.subscription.deleted: The subscription was canceled and has ended.
- invoice.payment_succeeded: A recurring payment processed successfully.
- invoice.payment_failed: A payment attempt failed, potentially triggering dunning.
Your webhook handler should update your database to reflect the current subscription state. Store the Stripe subscription ID, status, current period dates, and the price ID to determine the customer's entitlements. Always use the webhook data as the source of truth rather than relying solely on client-side callbacks, which can be unreliable.
Implement idempotency in your webhook handlers by tracking which events you have already processed. Stripe may send the same event multiple times in certain scenarios, and your handler should produce the same result regardless of how many times it runs. Store processed event IDs and skip duplicates to prevent issues like granting double credits.
Managing the Customer Lifecycle with Stripe Customer Portal
The Stripe Customer Portal dramatically reduces support burden by empowering customers to manage their own subscriptions. Through the portal, customers can update payment methods, view billing history, download invoices, change subscription plans, and cancel their subscriptions. This self-service capability is essential for scaling a SaaS platform efficiently.
Configure the Customer Portal in your Stripe Dashboard under the Billing settings. You can customize which actions customers can take, such as allowing plan changes or restricting cancellations to require contacting support. Set your branding colors and add your terms of service and privacy policy links to maintain a professional appearance.
To redirect customers to the portal, create a billing portal session on your server and redirect to the returned URL. Include the customer's Stripe customer ID and a return URL where they will land after leaving the portal. This flow typically takes just a few lines of code:
Create an API route that authenticated users can call to access their billing portal. Retrieve the Stripe customer ID from your database based on the logged-in user, create the portal session, and return the URL. Your frontend then redirects the user to this URL, and Stripe handles the rest.
The portal supports configuration options for what customers can modify. For example, you might allow customers to switch between monthly and annual billing but restrict them from downgrading during an active billing period. These business rules are configured in the Dashboard rather than code, making them easy to adjust as your policies evolve.
Handling Subscription Changes and Prorations
SaaS platforms frequently need to handle mid-cycle subscription changes. When a customer upgrades from a Basic to Professional plan halfway through their billing period, you must decide how to handle the pricing difference. Stripe's proration system automatically calculates credits and charges to ensure fair billing.
By default, Stripe prorates subscription changes immediately. The customer receives credit for the unused portion of their current plan and is charged for the remaining period on the new plan. This calculation happens automatically, and the resulting credit or charge appears on their next invoice or is collected immediately depending on your configuration.
You can customize proration behavior when updating subscriptions. The proration_behavior parameter accepts values like create_prorations (default), none (no proration), or always_invoice (immediately invoice for the change). Choose the behavior that aligns with your business model and customer expectations.
For downgrades, consider whether to apply the change immediately or at the end of the current billing period. Many SaaS platforms let customers keep their current tier's features until the period ends, then switch to the lower tier. Use the cancel_at_period_end flag or schedule the change using Stripe's subscription schedules feature.
| Proration Behavior | Use Case | Customer Experience |
|---|---|---|
| create_prorations | Standard upgrades/downgrades | Fair billing adjustment on next invoice |
| always_invoice | Immediate upgrades | Charged immediately for the difference |
| none | Free tier changes or promotions | No billing adjustment |
Implementing Trial Periods and Promotional Pricing
Free trials are a powerful acquisition tool for SaaS platforms, allowing potential customers to experience your product before committing financially. Stripe supports trial periods natively, making implementation straightforward. You can configure trials at the price level or apply them dynamically when creating subscriptions.
When creating a subscription with a trial, specify the trial_period_days parameter or set a trial_end timestamp. During the trial, the subscription status shows as trialing, and no charges occur. You should still collect payment information upfront to reduce friction when the trial converts to a paid subscription.
Handle the customer.subscription.trial_will_end webhook event to send reminder emails before trials expire. This event fires three days before the trial ends by default, giving you time to engage customers and encourage conversion. Personalized emails highlighting features they have used can significantly improve trial-to-paid conversion rates.
Promotional pricing through coupons and promotion codes adds flexibility to your pricing strategy. Create coupons in the Stripe Dashboard or via API, specifying percentage or fixed amount discounts. Coupons can apply once, for a limited duration, or forever. Promotion codes are customer-facing codes that apply coupons, useful for marketing campaigns.
Apply coupons during checkout by including the discounts parameter in your Checkout Session. Alternatively, enable the promotion code field in Checkout to let customers enter codes themselves. This flexibility supports various marketing strategies from influencer partnerships to seasonal promotions.
Multi-Tenant Billing Strategies for Platform Builders
Building a multi-tenant SaaS platform introduces additional complexity to billing architecture. When your platform enables clients to create their own applications or serves multiple organizations from a single codebase, you must carefully design how payments flow through the system. Several patterns address different business models.
For platforms where you bill tenants directly (B2B SaaS), each tenant becomes a Stripe customer with their own subscription. Your application maps tenant IDs to Stripe customer IDs, and webhook handlers route subscription updates to the correct tenant's data. This model works well for a multi-tenant boilerplate approach where you manage all billing centrally.
Marketplace-style platforms where tenants collect payments from their own customers require Stripe Connect. Connect enables your platform to facilitate payments between your tenants and their customers while taking a platform fee. Each tenant creates a connected Stripe account, and you use the platform's account to orchestrate transactions.
Connect supports several account types with different levels of platform control. Express accounts offer the fastest onboarding with Stripe-hosted dashboards, while Custom accounts give you complete control over the user experience. Standard accounts work well when tenants already have Stripe accounts they want to use.
Consider how subscription billing interacts with your tenant provisioning. When a new tenant signs up, you might create their Stripe customer record immediately or defer until they enter billing information. For platforms using a SaaS starter kit, this flow is often pre-built, handling customer creation, subscription management, and entitlement checking automatically.
Error Handling and Payment Recovery
Payment failures are inevitable in subscription billing. Credit cards expire, accounts have insufficient funds, and banks occasionally decline legitimate transactions. Robust error handling and automated recovery processes minimize revenue loss and customer churn from these issues.
Stripe's Smart Retries automatically attempt failed payments at optimal times based on machine learning models trained on billions of transactions. This feature recovers a significant percentage of failed payments without any action from you or your customers. Enable it in your Stripe Dashboard under Billing settings.
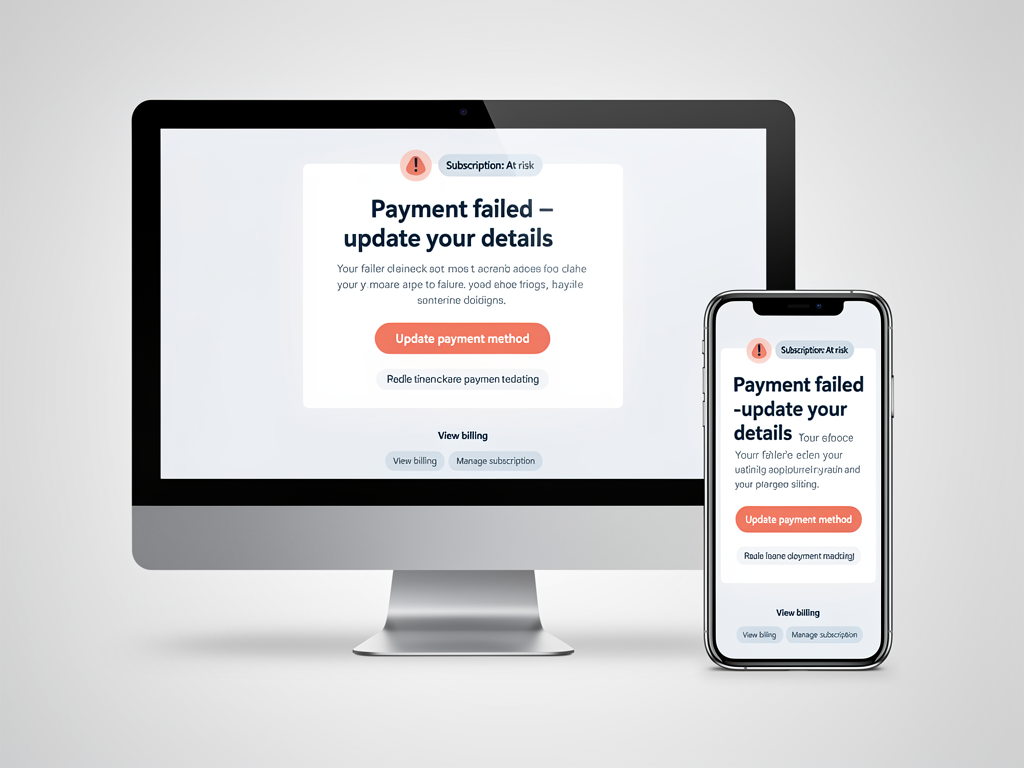
Implement dunning emails to notify customers of payment issues and prompt them to update their payment methods. Stripe can send these automatically, or you can handle the invoice.payment_failed webhook to send custom emails through your own system. Custom emails often perform better because they match your brand and can include personalized content.
Configure your subscription settings to determine what happens after repeated payment failures. Options include canceling the subscription immediately, marking it as past due while maintaining access, or pausing the subscription. The right choice depends on your business model and customer relationships.
For critical errors during checkout or subscription creation, provide clear feedback to users. Stripe's error objects include codes and messages that help diagnose issues. Map common error codes to user-friendly messages rather than displaying raw error text. For example, translate card_declined to "Your card was declined. Please try a different payment method."
Testing Your Stripe Integration Thoroughly
Comprehensive testing prevents payment issues from reaching production. Stripe provides extensive testing tools, including test mode, test card numbers, and the Stripe CLI for local webhook testing. Develop a testing strategy that covers happy paths, error scenarios, and edge cases.
Use Stripe's test card numbers to simulate various scenarios. The card 4242 4242 4242 4242 always succeeds, while 4000 0000 0000 0002 always declines. Other test cards simulate specific scenarios like insufficient funds, expired cards, or 3D Secure authentication requirements. Test each scenario your application might encounter.
The Stripe CLI enables local webhook testing without deploying your application. Run stripe listen --forward-to localhost:3000/api/webhooks to forward webhook events to your local development server. Trigger test events with commands like stripe trigger checkout.session.completed to verify your handlers work correctly.
Create automated tests for your payment flows using testing frameworks like Jest or Playwright. Mock Stripe API responses for unit tests, and use Stripe's test mode for integration tests. Your test suite should verify that subscriptions are created correctly, webhook handlers update database state appropriately, and error scenarios are handled gracefully.
Before launching, conduct end-to-end testing in Stripe's test mode with real user flows. Sign up for a subscription, upgrade plans, update payment methods, and cancel. Verify that all webhook events are received and processed correctly. This testing catches integration issues that unit tests might miss.
Optimizing for Conversion and Reducing Churn
Technical integration is only part of successful subscription billing. Optimizing your payment flows for conversion and implementing churn reduction strategies significantly impact revenue. Small improvements in conversion rates compound over time into substantial revenue differences.
Reduce checkout friction by pre-filling known information, supporting multiple payment methods, and minimizing form fields. Stripe Checkout handles many of these optimizations automatically, but if you are using Elements, consider enabling features like Link (Stripe's one-click checkout) and supporting local payment methods popular in your target markets.
Implement cancellation flows that attempt to retain customers. When a customer initiates cancellation, present alternatives like pausing their subscription, switching to a lower tier, or offering a discount. Stripe's Customer Portal supports some retention offers, or you can build custom cancellation flows that gather feedback and present targeted offers.
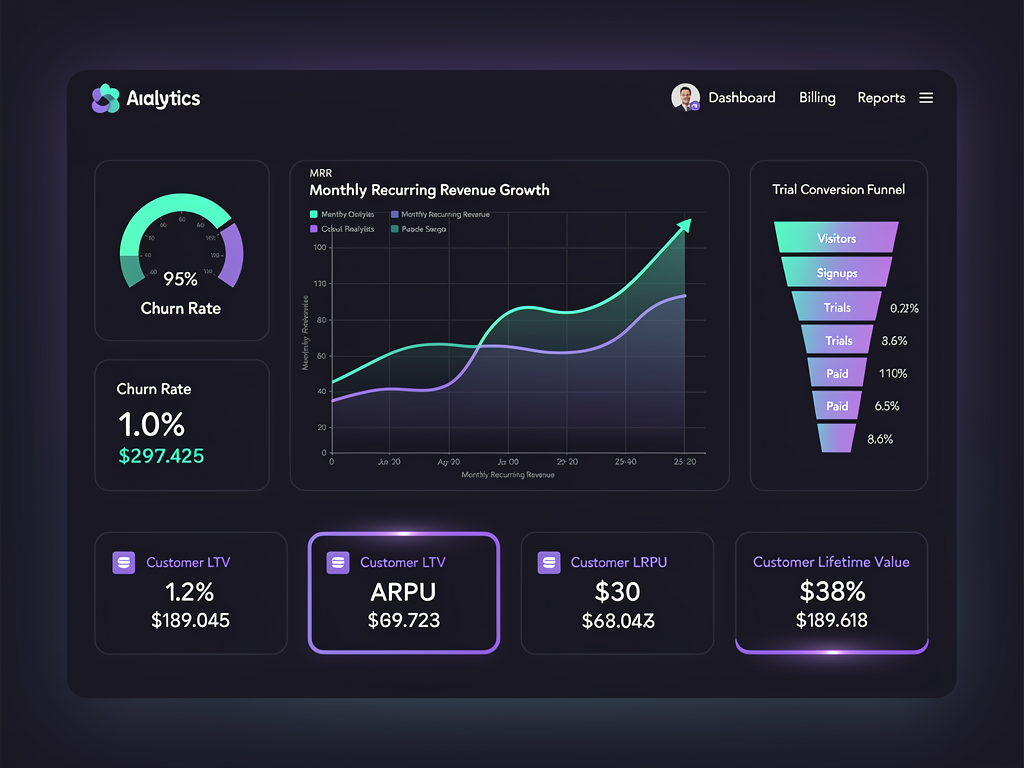
Monitor key metrics including Monthly Recurring Revenue (MRR), churn rate, trial conversion rate, and average revenue per user. Stripe's Dashboard provides basic analytics, while tools like Stripe Billing for SaaS offer more detailed insights. Use this data to identify problems and opportunities in your subscription business.
Consider implementing annual billing with a discount to improve cash flow and reduce churn. Customers on annual plans churn at significantly lower rates than monthly subscribers. Present annual pricing prominently and highlight the savings to encourage longer commitments.
Security Best Practices for Payment Integration
Payment processing demands rigorous security practices. While Stripe handles PCI compliance for card data, your application must protect customer information and prevent unauthorized access to billing functions. Implement these security measures throughout your integration.
Never log or store raw card numbers, CVVs, or other sensitive payment data. Stripe's tokenization ensures this data never touches your servers when using Checkout or Elements. If you must store payment-related information, limit it to non-sensitive data like the last four digits of a card for display purposes.
Verify webhook signatures on every request to prevent attackers from sending fake events. The signature verification uses your webhook signing secret, which should be stored securely in environment variables. Reject any webhook that fails signature verification immediately.
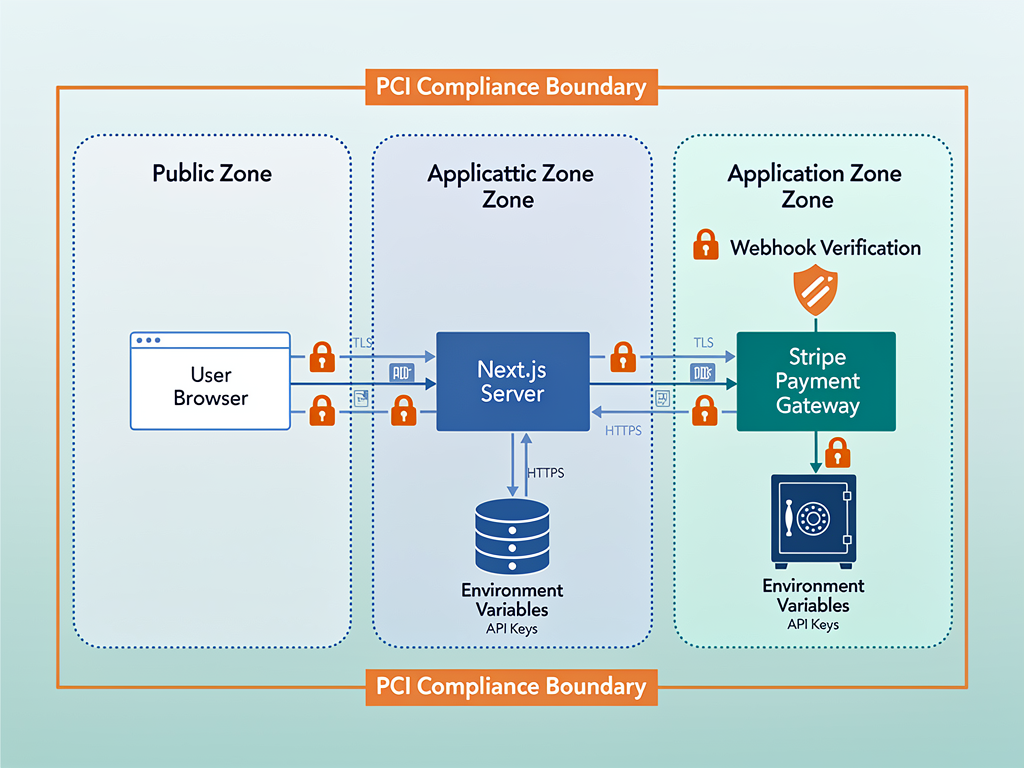
Implement proper authentication and authorization for billing-related endpoints. Only authenticated users should access their own subscription information, and only authorized administrators should access platform-wide billing data. Use your application's authentication system to verify identity before processing any billing requests.
Protect your API keys with appropriate access controls. Use restricted keys with minimal permissions for specific services when possible. Rotate keys periodically and immediately if you suspect compromise. Never commit keys to version control, and use secret management solutions in production environments.
Scaling Your Subscription Infrastructure
As your SaaS platform grows, your billing infrastructure must scale accordingly. Stripe handles the payment processing scale automatically, but your application's integration points require attention. Plan for growth from the beginning to avoid painful migrations later.
Optimize webhook processing for high volume. As you gain more subscribers, webhook volume increases proportionally. Use background job queues to process webhooks asynchronously rather than blocking the HTTP response. This approach improves reliability and allows you to handle traffic spikes gracefully.
Cache subscription data appropriately to reduce API calls. Store subscription status and entitlements in your database, updating them via webhooks. Check local data for authorization decisions rather than calling Stripe's API on every request. This pattern improves performance and reduces your Stripe API usage.
Consider using Stripe's Billing Portal API for programmatic access to portal features when you need deeper integration. This API lets you build custom subscription management interfaces while still leveraging Stripe's underlying functionality. It is particularly useful for white-label solutions where you want complete control over the user experience.
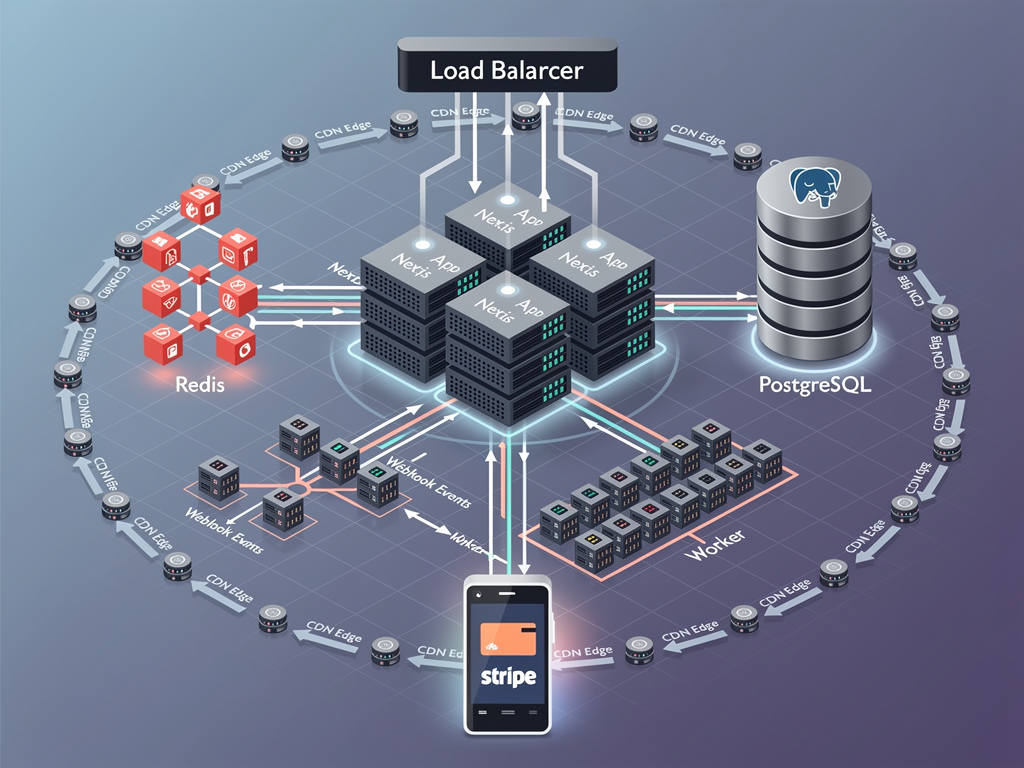
For platforms built on a Next.js SaaS template or SaaS boilerplate, scaling considerations are often addressed in the template's architecture. Solutions like SaaSCore's Next.js boilerplate include optimized patterns for subscription management that scale efficiently as your customer base grows.
Advanced Features for Enterprise SaaS Platforms
Enterprise customers often require billing features beyond basic subscription management. Metered billing, custom invoicing, and complex pricing models address these needs. Stripe supports these advanced scenarios, though they require more sophisticated integration work.
Usage-based billing charges customers based on consumption metrics like API calls, storage, or compute time. Implement this by reporting usage to Stripe throughout the billing period using the Usage Records API. At the end of each period, Stripe calculates the total and generates an invoice accordingly.
Subscription schedules enable complex billing scenarios like phased pricing, future plan changes, or promotional periods. Create a schedule that defines how a subscription should evolve over time, and Stripe executes the changes automatically. This feature is useful for enterprise contracts with negotiated pricing tiers.

Multi-currency support becomes important when serving international customers. Stripe supports over 135 currencies, and you can create prices in multiple currencies for the same product. Present prices in the customer's local currency to improve conversion rates and reduce confusion about exchange rates.
Invoice customization lets you add line items, apply credits, and include custom fields on invoices. This flexibility supports enterprise requirements like purchase order numbers, custom payment terms, or itemized billing for different services. Use Stripe's Invoice API to programmatically modify invoices before they are finalized.
Conclusion
Integrating Stripe with Next.js creates a powerful foundation for subscription billing in modern SaaS platforms. From the initial Checkout implementation to advanced features like usage-based billing and multi-tenant architectures, this combination provides the flexibility and reliability that growing businesses demand. The key to success lies in understanding both the technical integration points and the business logic that drives subscription revenue.
Start with Stripe Checkout for the fastest path to accepting payments, then expand to custom Elements implementations as your needs evolve. Prioritize webhook handling from day one, as accurate subscription state management prevents countless support issues and revenue leakage. Implement the Customer Portal early to empower customers and reduce your support burden.
Whether you are building a no-code platform, a client portal system, or a multi-tenant application, the patterns covered in this guide apply across use cases. Test thoroughly in Stripe's test mode, monitor your key metrics, and continuously optimize for conversion and retention. With proper implementation, your payment infrastructure becomes a competitive advantage rather than a source of technical debt.
Frequently Asked Questions
How Long Does It Take to Integrate Stripe Subscriptions with Next.js?
The timeline varies significantly based on your requirements and starting point. A basic Stripe Checkout integration can be completed in a few hours, including account setup, API configuration, and a simple success page. This approach works well for MVPs and initial launches. More comprehensive integrations with custom Elements, webhook handling, customer portal integration, and subscription management features typically require one to two weeks of development time. Using a Next.js starter kit or SaaS boilerplate with pre-built Stripe integration can reduce this to just a few days of customization. Enterprise features like usage-based billing, Stripe Connect for marketplaces, or complex proration logic may add additional weeks depending on your specific requirements.
Should I Use Stripe Checkout or Stripe Elements for My SaaS Platform?
Stripe Checkout is the recommended starting point for most SaaS platforms due to its faster implementation, built-in optimization, and automatic handling of compliance requirements. Checkout consistently achieves higher conversion rates because Stripe continuously optimizes the experience based on billions of transactions. Choose Stripe Elements when you need complete control over the payment UI, want to keep customers on your domain throughout the entire flow, or have specific branding requirements that Checkout cannot accommodate. Many successful platforms start with Checkout and only migrate to Elements if they encounter specific limitations. The embedded Checkout option offers a middle ground, providing Stripe's optimized payment flow while keeping the experience on your page.
How Do I Handle Failed Subscription Payments in Next.js?
Effective failed payment handling combines Stripe's automated features with custom application logic. Enable Smart Retries in your Stripe Dashboard to automatically retry failed payments at optimal times, which recovers approximately 15 to 20 percent of initially failed payments without any customer action. Listen for the invoice.payment_failed webhook event to trigger custom dunning emails that match your brand and include personalized content. Configure your subscription settings to determine behavior after repeated failures, such as marking subscriptions as past due, pausing access, or canceling after a grace period. Provide customers easy access to update their payment method through the Customer Portal or a custom billing page. Track failed payment metrics to identify patterns, such as specific card types or regions with higher failure rates.
Can I Implement Multi-Tenant Billing Where Each Tenant Has Their Own Stripe Account?
Yes, Stripe Connect enables this marketplace-style architecture where your platform facilitates payments between tenants and their customers. Each tenant creates a connected Stripe account (Express, Standard, or Custom type depending on your needs), and your platform orchestrates transactions using the Connect API. This approach lets tenants manage their own payouts, view their own dashboards, and maintain direct relationships with Stripe. You can collect platform fees on each transaction as either a percentage or fixed amount. The implementation complexity is higher than direct billing, requiring additional onboarding flows, account management interfaces, and more sophisticated webhook handling. Consider whether this model fits your business before committing to the additional development effort.
What Is the Best Way to Test Stripe Webhooks During Local Development?
The Stripe CLI provides the most effective local webhook testing workflow. Install the CLI and run stripe listen --forward-to localhost:3000/api/webhooks to create a tunnel that forwards webhook events to your local development server. The CLI provides a temporary webhook signing secret for local testing. Trigger specific events using commands like stripe trigger checkout.session.completed or stripe trigger invoice.payment_failed to test your handlers without completing actual payment flows. For more complex scenarios, use the Stripe Dashboard's webhook testing feature to send events to your deployed staging environment. Implement comprehensive logging in your webhook handlers during development to trace event processing and identify issues quickly.
How Do I Migrate Existing Subscriptions When Changing Pricing or Plans?
Subscription migrations require careful planning to avoid disrupting existing customers. For price changes, decide whether to grandfather existing subscribers at their current rate or migrate them to new pricing. Stripe supports both approaches through subscription updates. To grandfather customers, simply leave their existing subscriptions unchanged while creating new prices for new subscribers. For migrations, use the Subscription Update API to change the price ID, specifying your preferred proration behavior. Consider communicating changes to customers well in advance, especially for price increases. For major plan restructuring, Stripe's subscription schedules feature lets you queue changes to take effect at the next billing period. Always test migrations thoroughly in test mode with representative subscription data before executing in production.
Ready to Launch Your SaaS Platform with Built-In Stripe Billing?
Stop spending weeks building payment infrastructure from scratch. NextBuilder provides a complete multi-tenant Next.js boilerplate with Stripe subscription billing already integrated. Accept payments, let your clients monetize their apps, and manage subscriptions through a polished admin dashboard. With custom subdomains, SSL, and a self-hosting guide included, you can launch your no-code SaaS platform in days instead of months. Get started with NextBuilder today and focus on what makes your platform unique.
Subscribe to our newsletter
Subscribe to our newsletter and stay up-to-date with the latest news and updates.